Posts Tagged ‘ssh’

Beginner’s Guide to HPE 5000 Series Switches

October 14, 2017

I don’t closely track the popularity of my blog. If what I share helps people in their day to day job, it’s already good enough to me. But I do look at site statistics now and then just out of curiosity and it seems that network-related posts get a lot of popularity. A blog post I wrote a while ago on Dell N4000 switches has quickly got in top five over the last year.

So it seems that there is a demand for entry-level switch configuration guides. I’ve worked with a quite a few different switch brands over the years, so I thought I will build on the success of the Dell blog post and this time write about HPE FlexNetwork/FlexFabric 5000 switch series.

Operating Systems

HPE has several network switch product lines. I won’t even try to cover all of them in this post. But it’s important to know that there are a few different operating systems you can encounter, while working with HPE network switches. There is a familiar ProCurve product portfolio (now merged with Aruba), which is based on ProVision operating system.

HPE FlexNetwork/FlexFabric 5000 series, on the other hand, is based on Comware operating system. It has a different CLI command set and can be a complete surprise if you’ve worked only with ProCurve switches before. So this blog post will be particularly valuable for those who’re dealing with HPE 5000 for the first time.

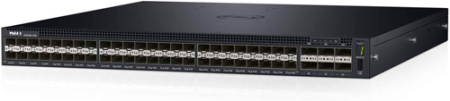
The following guide has been tested on a pair of HPE FlexFabric 5700-series switches. Even though commands are mostly the same, on other switch series, like FlexNetwork 5800, there might be some minor differences.

Initial Configuration

When the switch is booted for the first time it will start automatic configuration by trying to obtain settings over DHCP, which you can interrupt by Ctrl+C to get straight to CLI.

You start in user view where you can run display commands to review switch settings. To start the configuration, change to system view:

> system-view

Let’s start by configuring remote access to the switch. There are two ways you can do that. You either use the out-of-band management port:

> interface M-GigabitEthernet 0/0/0
> ip address 10.10.10.10 255.255.255.0
> ip route-static 0.0.0.0 0.0.0.0 10.10.10.1

Or you can configure a VLAN interface IP address:

> interface vlan-interface 1
> ip address 10.10.10.10 255.255.255.0
> ip route-static 0.0.0.0 0.0.0.0 10.10.10.1

Then configure switch name, enable SSH, set passwords and you can start managing the switch over SSH:

> sysname switchname

> public-key local create rsa
> ssh server enable
> user-interface vty 0 15
> authentication-mode scheme
> protocol inbound ssh

> super password simple yourpassword
> local-user admin
> password simple yourpassword
> authorization-attribute user-role level-0
> service-type ssh

User “admin” will have an unprivileged role. You will need to run the following command and enter password once logged in, to elevate to network admin rights:

> super

Intelligent Resilient Framework

In small non-business-critical environments one standalone switch is usually sufficient. In larger environments switches are typically deployed in pairs for redundancy. To simplify management and to avoid network loops most switches support some sort of MLAG or stacking. IRF is HPE’s version of it.

Determine what ports you’re going to use for IRF. There are two QSFP+ ports on 5700-series dedicated for it. And then on on the first switch (master) run the following commands (it’s recommended to shut down the ports before you set them up as IRF):

> irf member 1 priority 32
> int range FortyGigE 1/0/41 to FortyGigE 1/0/42
> shutdown
> irf-port 1/1
> port group interface FortyGigE 1/0/41
> irf-port 1/2
> port group interface FortyGigE 1/0/42
> int range FortyGigE 1/0/41 to FortyGigE 1/0/42
> undo shut
> save
> irf-port-configuration active

On the second switch (slave) run the following commands to change the IRF ID to 2:

> irf member 1 renumber 2
> reboot

When the switch comes up, configure IRF ports:

> irf member 2 priority 30
> int range FortyGigE 2/0/41 to FortyGigE 2/0/42
> shutdown
> irf-port 2/1
> port group interface FortyGigE 2/0/41
> irf-port 2/2
> port group interface FortyGigE 2/0/42
> int range FortyGigE 2/0/41 to FortyGigE 2/0/42
> undo shut
> save
> irf-port-configuration active

Now you can connect the physical IRF ports. IRF is a ring topology, that means (in my case) port 1/0/41 should connect to 2/0/42 and port 1/0/42 should connect to 2/0/41.

Second switch will automatically reboot and if all is configured correctly, you should see both switches join the IRF fabric. Member switch 1 has the highest priority of 32 and becomes the master:

> display irf

Firmware Upgrade

Firmware upgrade is the next logical step after you set up IRF. The latest firmware revision for the switches can be download from HPE web-site. Keep in mind you will need a HPE passport account, with a valid service agreement (SAID) added to it.

You will also need a TFTP server to upgrade the firmware. There are a few of them out there, but the most commonly used is probably Tftpd64.

When you get the TFTP server up and running and copy the firmware file to it, perform an upgrade:

> tftp 10.10.10.20 get 5700-CMW710-R2432P03.ipe
> boot-loader file flash:/5700-CMW710-R2432P03.ipe slot 1 main
> boot-loader file flash:/5700-CMW710-R2432P03.ipe slot 2 main
> irf auto-update enable
> reboot

Confirm firmware has been updated:

> display version

VLANs, Aggregation Groups and Tagging

In Comware the term “aggregation group” is used to describe what is a “port channel” in Cisco world. Trunk/access ports are also called tagged/untagged ports throughout the documentation.

In this section we will discuss a few common port configuration scenarios:

  • Untagged ports, which can be your iSCSI storage array ports
  • Tagged ports, such as your VMware host uplinks
  • Aggregation groups, typically used for LAGs to upstream switches

First of all create all VLANs and give them descriptions:

> vlan 10
> description iSCSI
> vlan 20
> description Server
> vlan 30
> description Dev and test

Then specify untagged ports:

> vlan 10
> port te 1/0/1
> port te 2/0/1

To configure tagged ports and allow certain VLANs (ports will be added to the VLANs automatically):

> int te 1/0/2
> description ESX01 vmnic0
> port link-type trunk
> port trunk permit vlan 20 30
> int te 2/0/2
> description ESX02 vmnic0
> port link-type trunk
> port trunk permit vlan 20 30

And to create an LACP aggregation group:

> interface bridge-aggregation 1
> description Trunk to upstream switch
> link-aggregation mode dynamic
> port link-type trunk
> port trunk permit vlan 20 30

> interface te 1/0/3
> port link-aggregation group 1
> interface te 2/0/3
> port link-aggregation group 1

Common Commands

Other useful commands that don’t fall under any specific category, but handy to know.

Display switch configuration:

> display current-configuration

Save switch configuration:

> save

Shut down a port:

> int te 1/0/27
> shutdown

Undo a command:

> undo shutdown

Conclusion

Whether you are a network engineer new to the Comware operating system or a VMware administrator looking for a quick cheat sheet for FlexNetwork/FlexFabric switches, I hope this guide has helped you get the job done.

If this blog post gets the same amount of popularity, maybe it will turn into another series. But for now – over and out.

Dell Force10 Part 1: Initial Configuration

July 3, 2016

force10_S4048_on
When it comes to networking Dell has two main series of switches. PowerConnect/N-series, which run DNOS 6.x operating system. And S/Z-series switches, which run on DNOS 9.x derived from Force10 OS (FTOS). In this series of blogs we will go through the configuration of Force10 switch series and use Dell S4048-ON top of the rack switch as an example.

Interesting to note, that unlike other S-series switches S4048-ON is an Open Networking switch. Dell is one of the first companies which apart from its own OS lets customers run other operating systems on its network switches, such as Cumulus Linux OS and Big Switch Networks Switch Light OS. While Cumulus and Big Switch has its own use cases, in this blog we will look specifically at configuring FTOS.

Boot process

S4048-ON comes from the factory pre-configured for bare metal provisioning (BMP). This is what you will see when you boot the switch for the first time:

s4048_bmp

If you just want to boot FTOS, simply skip the BMP by choosing A and switch will boot the OS.

After some time BMP will time out. If you’ve missed the above wizard, you can also disable BMP from CLI using the following commands:

> enable
# stop bmp
# config
# reload-type normal-reload
# exit
# reload

When prompted choose to save the configuration and proceed with reload. After the switch has rebooted check that the next boot is set to normal reload:

# show reload-type

Initial configuration

First steps of any switch installation is assigning a hostname and management interface settings:

# hostname DELL4048-SWITCH
# int managementethernet 1/1
# ip address 172.10.10.2/24
# no shut
# management route 0.0.0.0/0 172.10.10.10

Then set admin / enable passwords and allow remote management via SSH:

# enable password 123456
# username admin password 123456
# ip ssh server enable

Configure time zone and NTP:

# clock timezone UTC 11
# ntp server 172.10.10.20
# show ntp associations
# show ntp status
# show clock

Firmware upgrade

Force10 switches have two boot banks A: and B:. It’s a good practice to upload new firmware into one boot bank and keep the old firmware in the other in case you need to roll back.

The easiest way to upgrade is via TFTP using Tftpd64, which you can download for free from here. If you’re upgrading an existing switch, make sure to save the running config and make a backup. If it’s an initial install you can skip this step.

# copy run start
# copy start tftp://10.0.0.1/FORCE10_SWITCH_01.01.16.conf

Then upload new firmware to image B:, change active boot bank to B: and reload:

# show version
# show boot system stack-unit 1
# upgrade system tftp://10.0.0.1/FTOS-SK-9.9.0.0P9.bin b:
# conf t
# boot system stack-unit 1 primary system b:
# exit
# reload

You will be prompted to save the configuration and reboot. After the reboot you may be asked to enable SupportAssist. SuppotAssist helps to automatically open Dell service tickets if there is a switch fault. You can enable SupportAssist by running the following commands and answering prompts:

supportassist

# conf t
# support-assist activate
# support-assist activity full-transfer start now
# show support-assist status

My pair of switches were configured in a Virtual Link Trunking (VLT) domain. I’ll explain how VLT works later in the series. But from the upgrade point of view, each switch in a VLT domain is treated as a separate switch and has to be upgraded separately. If you decided to use a stack instead of VLT, you can find the upgrade process for a Force10 stack in my other post about Dell MXL switches here.

Spanning tree

Spanning Tree Protocol (STP) helps to prevent network topology loops and is highly recommended for use in any network. Switches connected in an actual loop topology in today’s networks are rare. But STP can save you from consequences of a potential human error, such as port channel misconfiguration. If instead of creating one port channel with two links, you by mistake create two port channels with one link each and both carry the same VLANs, you’ve accidentally created a loop, which will bring your whole network to an immediate halt.

It’s a good practice to enable STP as a safeguard mechanism from such configuration errors. S4048-ON supports STP, RSTP, MSTP and PVST+. In my case S4048s were uplinked into HP core, which supported STP, RSTP and MSTP. If you have Cisco switches in your network core you can use PVST+. In my case I used RSTP, which is a good choice if you don’t require enhancements of MSTP and PVST+ in your network. Just make sure to not use the basic STP protocol, as it provides the slowest convergence.

# protocol spanning-tree rstp
# no disable
# show spanning-tree rstp

In every STP topology there is also a root switch, which by default is selected automatically. For a more deterministic STP behaviour it’s recommended to select the root switch manually, by assigning the lowest STP priority to it. Typically your core switch should be your root switch. In my case it was a HP core switch, which was assigned priority of “0”.

When configuring server and storage facing ports make sure to enable EdgePort mode to minimize the time it takes for the port to come online:

# int range Te1/45-1/48
# spanning-tree rstp edge-port
# switchport
# no shut

If you want to know more about how STP works, you can read a few of my previous blog posts on STP here and here.

Flow control

To avoid dropped packets on 10Gb switch ports at times of potential heavy utilization it is also a best practice to as a minimum enable bi-directional Flow Control on the storage array ports. I enabled it on the iSCSI links connected from the Dell Compellent storage array:

# int range Te1/17-1/18
# flowcontrol rx on tx on

If you specifically interested in switch best practices for Compellent and EqualLogic storage arrays, Dell has a full list of guides for various switches at communitites wiki here.

Port channels and VLANs

Port channels and VLANs are configured similarly to any other switch, but I include them here in case you want to know the syntax. In this example we have two access ports 1/46 and 1/47 and an uplink to the core configured as port channel 1:

# interface port-channel 1
# switchport
# no shutdown

# interface range Te1/1-1/2
# port-channel-protocol LACP
# port-channel 1 mode active
# no shutdown

# int vlan 254
# untagged Te1/46-1/47
# tagged po 1

Keep in mind, that port channels are used either in one switch configurations or when two or more switches are stacked together. If you’re using Virtual Link Trunking (VLT), you will need to create Virtual Link Trunks (VLTs). Which are similar to port channels, but have a slightly different syntax. We will talk about VLT in much more detail in the following Force10 blogs.

Conclusion

One feature which I didn’t specifically mentioned in this blog post was Jumbo Frames. I tend not to use it in my deployments until I see convincing evidence of it making a difference for iSCSI/NFS storage implementations. I did a post about Jumbo Frames long time ago here and hasn’t changed my opinion ever since. Interested to here your thoughts if have a different take on that.

References

VMware ESXi Core Processes

July 12, 2013

vmware_esxiThere are not much information on VMware ESXi architecture out there. There is an old whitepaper “The Architecture of VMware ESXi” which dates back to 2007. In fact, from the management perspective there are only two OS processes critical two ESXi management. These are: hostd (vmware-hostd in ESXi 4) and vpxa (vmware-vpxa in ESXi 4) which are called “Management Agents”.

hostd process is a communication layer between vmkernel and the outside world. It invokes all management operations on VMs, storage, network, etc by directly talking to the OS kernel. If hostd dies you won’t be able to connect to the host neither from vCenter nor VI client. But you will still have an option to connect directly to the host console via SSH.

vpxa is an intermediate layer between vCenter and hostd and is called “vCenter Server Agent”. If you have communication failure between vCenter and ESXi host, it’s the first thing to blame.

Say you have a storage LUN failure and hostd can’t release the datastore. You can restart hostd or both of the processes using these scripts:

# vmware-hostd restart
# vmware-vpxa restart

NetApp SSH Connection Times Out

May 31, 2013

PuTTYPortable_128There is one tricky thing about SSH connections to NetApp filers. If you use PuTTY or PuTTY Connection Manager and you experience frequent timeouts from ssh sessions, you might need to fiddle around with PuTTY configuration options. It seems that there is some issue with how Data ONTAP implements SSH key exchanges, which results in frequent annoying disconnections.

In order to fix that, on PuTTY Configuration screen go to Connection -> SSH -> Bugs and change “Handles SSH2 key re-exchange badly” to ‘On’. That should fix it.

Basic UPC compiler installation

October 8, 2012

There were times when I used to work heavily on one UPC-related project. I had several issues with installation of the Berkeley UPC compiler. I don’t want that information to be wasted, so I will share it here with everyone in several posts. I worked with Berkeley UPC versions until 2.14.0. So this post can already be obsolete for you.

Compilation

Berkeley UPC compiler consists of a runtime and a translator (you can use online translator if you want). They are installed separately. I used several flags in configure stage I’d like to explain.

First flag is --without-mpi-cc. UPC supports several underlying transports to exchange messages between threads. The most basic is udp, I worked primarily on ibv (InfiniBand). UPC also installs mpi transport by default. It’s slow and it requires MPI installation, so I never used it and prefered to disable it.

Flag --disable-aligned-segments is ususally a must in Linux environments. There is a security feature which randomizes the virtual address space. This doesn’t allow UPC threads to use the same base memory address on all nodes. It introduces some additional pointer arithmetic in the deference of a UPC pointer-to-shared. So you either disable Linux virtual address space randomization feature or use this flag.

It is stated that UPC can have issues with GCC 4.0.x through 4.2.x as a backened compiler. GCC can misoptimize a shared-local access such that it deterministically read or write an incorrect value. So you cannot install UPC without using the --enable-allow-gcc4 flag. I didn’t have any issues with GCC ever, so you can safely use it.

Post-installation tasks

After installation is completed you need to point UPC runtime to your locally installed translator. Otherwise it will try to use online translator on the Berkeley web-site. Under each UPC build subdirectory (opt, dbg, etc) replace translator directive in etc/upcc.conf to:

translator = /opt/translator-installation-dir/targ

You need to correctly configure NFS and SHH on your nodes, so that they could access and run your application binary files without password. If you use firewall you need to open all necessary ports. For me they were:

111 tcp, udp for portmapper
2049 tcp for nfs
892 tcp, udp for mountd
32803 tcp, 32769 udp for lockd
662 tcp,udp for statd

Since lockd uses dynamic ports, uncomment static port configuration in /etc/sysconfig/nfs:

LOCKD_TCPPORT=32803
LOCKD_UDPPORT=32769
MOUNTD_PORT=892
STATD_PORT=662

SSH is also just a walk in the park:

# su – fred
> ssh-keygen -t rsa
> cp /home/fred/.ssh/id_rsa.pub /home/fred/.ssh/authorized_keys
> chmod /home/fred/.ssh/authorized_keys 600
> chown fred:fred /home/fred/.ssh/authorized_keys

Usage example

> upcc --network=udp source_code.c
> UPC_NODES=”node1 node2 node3 node4″ upcrun -n 32 bin_file

You choose conduit by using --network flag, UPC_NODES environment variable sets hosts which will run the code and -n sets the number of threads.

Possible problems

You can encounter the following error when you run UPC application:

*** FATAL ERROR: Got an xSocket while spawning slave process: connect() failed while creating a connect socket (111:Connection refused)
bash: line 1: 10535 Aborted ‘./a.out’ ‘__AMUDP_SLAVE_PROCESS__’ ‘node1:49655’

This could happen if you use firewall and didn’t uncomment static port configuration for lockd daemon. Each time it uses random port which doesn’t match to what you entered in firewall configuration and fail to communicate.

If you get an error which starts with:

Address node1_ip_address maps to node1, but this does not map back to the address – POSSIBLE BREAK-IN ATTEMPT!
AMUDP sendPacket returning an error code: AM_ERR_RESOURCE (Problem with requested resource)
from function sendPacket
at /root/install/berkeley_upc-2.8.0/gasnet/other/amudp/amudp_reqrep.cpp:99
reason: Invalid argument

or

AMUDP sendPacket returning an error code: AM_ERR_RESOURCE (Problem with requested resource)
from function sendPacket
at /root/install/berkeley_upc-2.8.0/gasnet/other/amudp/amudp_reqrep.cpp:99
reason: Invalid argument

then you have /etc/hosts misconfiguration. Don’t add compute node hostname to 127.0.0.1 line in /etc/hosts. There should be only real address line. /etc/hosts on each node should look something like this:

# Do not remove the following line, or various programs
# that require network functionality will fail.
127.0.0.1 localhost.localdomain localhost
::1 localhost6.localdomain6 localhost6
10.0.0.1 node1
10.0.0.2 node2
10.0.0.3 node3

Initial Cisco switch configuration

June 28, 2012

First steps you need to do when you unpack your Cisco switch, for example Catalyst 2960, are configuring passwords and IP access via telnet and ssh. Cisco networking switches and routers have two primary operation modes: User (unprivileged) and Enable (privileged). In User mode you can simply look around, but in Enable mode you can reboot a switch, change configuration info, as well as screw everything up. You are safe in User mode. Switch also has tons of hierarchical configuration modes where you perform actual configuration.

Switch has three passwords: two for User mode (for connection from serial console and for external telnet and ssh connections) and one for Enable mode. Here is how you configure passwords after you unpack your switch and connect the serial cable.

Enter configuration mode:

enable
configure terminal

Configure console password:

line console 0
password pass1
login
exit

Configure ssh and telnet password:

line vty 0 15
password pass2
login
exit

Configure Enable password:

enable secret pass3
exit

‘login’ command tells switch to ask for User mode password. It doesn’t do that by default. Switch has 16 virtual (ssh and telent) consoles, that is why you see ‘0 15’ range in ‘line vty 0 15’ command.

Now to get IP access to the switch you need to configure so-called ‘VLAN 1 interface’:

enable
configure terminal
interface vlan 1
ip address 192.168.1.200 255.255.255.0
no shutdown
exit

ip default-gateway 192.168.1.1
exit

VLANs are not subject of this topic. But to make it a bit more clear, VLAN 1 is a special VLAN where all switch ports are connected. It’s done so that you could connect to the switch by telnet/ssh from any port. ‘no shutdown’ command here brings interface up. It’s disabled by default.

After you’ve made an initial configuration, your changes are active but not saved. After a reload you will have empty switch configuration. To save the configuration changes run:

copy running-config startup-config

Cheers!

Configuring remote access to AIX

May 16, 2012

I work on an old AIX 5.1:

# oslevel -r
5100-03

By default it has only telnet preinstalled. Which works out of the box without additional configuration. However, there are several recommended steps to do.

Telnet

Firstly check if you have stable network connection. I had problems connecting to AIX box after connection timeout. It seemed that telnet session somehow hang on the OS side and didn’t allow me to reconnect. To prevent that, you have two options. If you use PuTTY then go to Settings->Connection and set amount of seconds between keepalive packets to say 60 seconds. And PuTTY will maintain connection automatically. Another workaround is to edit TMOUT variable in /etc/profile. By default AIX uses ksh shell which uses this parameter to detect idle sessions. If set this variable to 120, then after two minutes ksh will throw a warning that session will be closed in 60 seconds. This means that if your telnet session breaks, ksh will automatically terminate its shell. (I checked that and it turned out that TMOUT doesn’t help here.)

TCP Wrapper

By default telnet access in AIX is opened for everyone. It’s not what you want for sure. AIX has built-in firewall (called AIX TCP/IP Filters) but it’s rather cumbersome to use it just to restrict telnet access. I’d prefer TCP Wrapper, which is standard for Linux, but optional for AIX. You can get AIX LPP package from Bull AIX freeware site here: http://www.bullfreeware.com/index2.php?page=lppaix51. Then simply:

chmod +x tcp_wrappers-7.6.1.0.exe

Extract package contents by running the executable. Then run smit from directory where you extracted files and go to Software Installation and Maintenance -> Install and Update Software ->  Install Software. Set current directory in “INPUT device / directory for software”. You can view software available, if you press F4 in “SOFTWARE to install” field. Change “ACCEPT new license agreements?” to yes and press Enter.

When package is installed, edit /etc/inetd.conf. Find telnet line and change it:

#telnet stream tcp6 nowait root /usr/sbin/telnetd telnetd -a
telnet stream tcp6 nowait root /usr/local/bin/tcpd telnetd -a

And restart inetd service:

stopsrc -s inetd && startsrc -s inetd

Now to limit telnet access create /etc/hosts.allow:

telnetd: 123.234.123.234 234.123.234.123

and /etc/hosts.deny:

ALL:ALL

Secure Shell

Telnet is completely outdated and insecure protocol. So you’d probably prefer ssh on the server side. I believe SSH is bundled with AIX 5.1, but I simply downloaded it from Bull site. Additionally to OpenSSH package you will have to setup OpenSSL prerequisite. Here are the links:

http://www.bullfreeware.com/affichage.php?id=779
http://sourceforge.net/projects/openssh-aix/files/openssh-aix51/4.1p1/

Install OpenSSL simply by:

rpm -i openssl-0.9.7l-1.aix5.1.ppc.rpm

In case of OpenSSH you will need to gunzip it, untar it and setup using smit. But if you work on AIX with old maintenance level (ML3 in my case) you can run into the following error when running ssh service:

getnameinfo failed: Invalid argument

You can see it if you run sshd with -D and -d flags. Solution here is to download AIX 5.1 ML9 and POSTML9 fixes from IBM Fix Central, extract them and setup in Software Installation and Maintenance -> Install and Update Software ->  Update Installed Software to Latest Level (Update All).

SSH is a standalone service, so you do not need to edit /etc/inetd.conf. Just add new sshd line to /etc/hosts.allow and you are good to go. However, if your ssh was built without wrapper support, then you have a problem. You can check that by calling:

# dump -H /usr/sbin/sshd

/usr/sbin/sshd:

                        ***Loader Section***
                      Loader Header Information
VERSION#         #SYMtableENT     #RELOCent        LENidSTR
0x00000001       0x00000115       0x00000601       0x00000096

#IMPfilID        OFFidSTR         LENstrTBL        OFFstrTBL
0x00000006       0x00006224       0x0000075a       0x000062ba

                        ***Import File Strings***
INDEX  PATH                          BASE                MEMBER
0      /usr/lib:/lib:/opt/freeware/lib
1                                    libc.a              shr.o
2                                    libpthreads.a       shr_comm.o
3                                    libpthreads.a       shr_xpg5.o
4                                    libcrypto.a         libcrypto.so.0.9.7
5                                    libz.a              libz.so.1

If there is no libwrap.a, then the only option you have is to run sshd under tcpd which is run by inetd. To accomplish that add the first line into /etc/services and second into /etc/inetd.conf:

ssh 22/tcp
ssh stream tcp6 nowait root /usr/local/bin/tcpd sshd -i

Switch ‘-i’ tells sshd to generate smaller keys. Otherwise you will wait significant amount of time for login prompts. Also don’t forget to remove sshd startup and shutdown scripts from /etc/rc.d/rc2.d.

Security on NetApp Filer

October 9, 2011

Storage systems usually store data critical for organization like databases, mailboxes, employee files, etc. Typically you don’t provide access to NAS from Internet. If Filer has real IP address to provide CIFS or NFS access inside organization you can just close all incoming connections from outside world on frontier firewall. But what if networking engineer mess up firewall configuration? If you don’t take even simple security measures then all your organization data is at risk.

Here I’d like to describe basic means to secure NetApp Filer:

  • Disable rsh:

options rsh.enable off

  • Disable telnet:

options telnet.enable off

  • Restrict SSH access to particular IP addresses. Take into consideration that if you enabled AD authentication Administrator user and Administrators group will implicitly have access to ssh.

options ssh.access host=ip_address_1,ip_address_2

  • You can configure Filer to allow files access via HTTP protocol. If you don’t have HTTP license or you don’t use HTTP then disable it:

options http.enable off

  • Even if you don’t have HTTP license you can access NetApp FilerView web interface to manage Filer. You can access it via SSL or plain connection, apparently SSL is more secure:

options http.admin.enable off

options http.admin.ssl.enable on

  • Restrict access to FilerView:

options httpd.admin.access host=ip_address_1,ip_address_2

  • If you don’t use SNMP then disable it:

options snmp.enable off

  • I’m using NDMP to backup Filer’s data. It’s done through virtual network. I restrict NDMP to work only between Filers (we have two of them) and backup server and only through particular virtual interface:

On Filer1:

options ndmpd.access “host=backup_server_ip,filer2_ip_address AND if=interface_name”

options ndmpd.preferred_interface interface_name

On Filer2:

options ndmpd.access “host=backup_server_ip,filer1_ip_address AND if=interface_name”

options ndmpd.preferred_interface interface_name

  • Disable other services you don’t use:

options snapmirror.enable off

options snapvault.enable off

  • Module which is responsible for SSH and FilerView SSL connections is called SecureAdmin. You probably won’t need to configure it since it’s enabled by default. You can verify if ssh2 and ssl connections are enabled by:

secureadmin status

  • Make sure all built-in users have strong passwords. You can list built-in users by:

 useradmin user list

  • By default Filer has home directory CIFS shares for all users. If you don’t use them, disable them by deleting:

/etc/cifs_homedir.cfg

  • Filer also has ETC$ and C$ default shares. I’d highly recommend to restrict access to these shares only to local Filer Administrator user. In fact, if you enabled AD authentication then also domain Administrator user and Administrators group will implicitly have access to these shares, even if you don’t  specify them in ACL. Delete all existing permissions and add:

cifs access share etc$ filer_system_name\Administrator Full Control
cifs access share c$ filer_system_name\Administrator Full Control

Basically this is it. Now you can say that you know hot to configure simple NetApp security.